Ventoy is a free, open-source tool that makes it incredibly easy to create a multiboot USB flash drive or external drive. It supports both UEFI and Legacy boot modes, works with MBR and GPT partition schemes, and requires no complex setup—just copy your ISO files to the USB drive, and you’re good to go. The tool is available for both Windows and Linux; in this guide, we’ll focus on the Windows version.
How to Quickly Create a Multiboot USB with Ventoy
If you just want to get started quickly, here’s a simple step-by-step guide to create a multiboot USB drive with Ventoy using the default settings.
Steps:
-
Download Ventoy:
Go to the official GitHub page https://github.com/ventoy/Ventoy/releases and download the latest release. Extract the ZIP file to a convenient location. -
Run the Program:
LaunchVentoy2Disk.exe. If Windows SmartScreen shows a warning, click “More info” and then “Run anyway.” -
(Optional) Change the Interface Language:
If needed, you can change the interface language by going to theLanguagemenu. (English is selected by default.) -
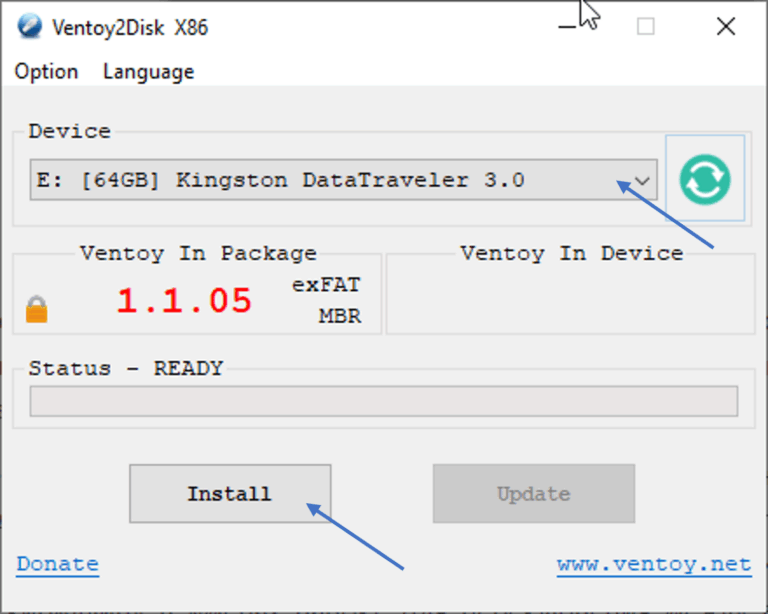
Select Your USB Drive:
In the main Ventoy window, choose the USB drive you want to use. Note: All data on the drive will be erased by default. (However, it is possible to retain existing data—more on that later.)
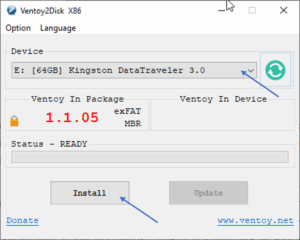
5. Install Ventoy:
Click the “Install” button. Ventoy will format and prepare the drive to support booting from ISO files.
6. You’ll be asked to confirm twice that all data on the USB drive will be erased. Make sure you’ve backed up anything important, then confirm both prompts.

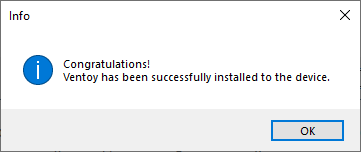
7. In a few seconds, Ventoy will display a message saying the installation was successful. Click OK, then close the program.
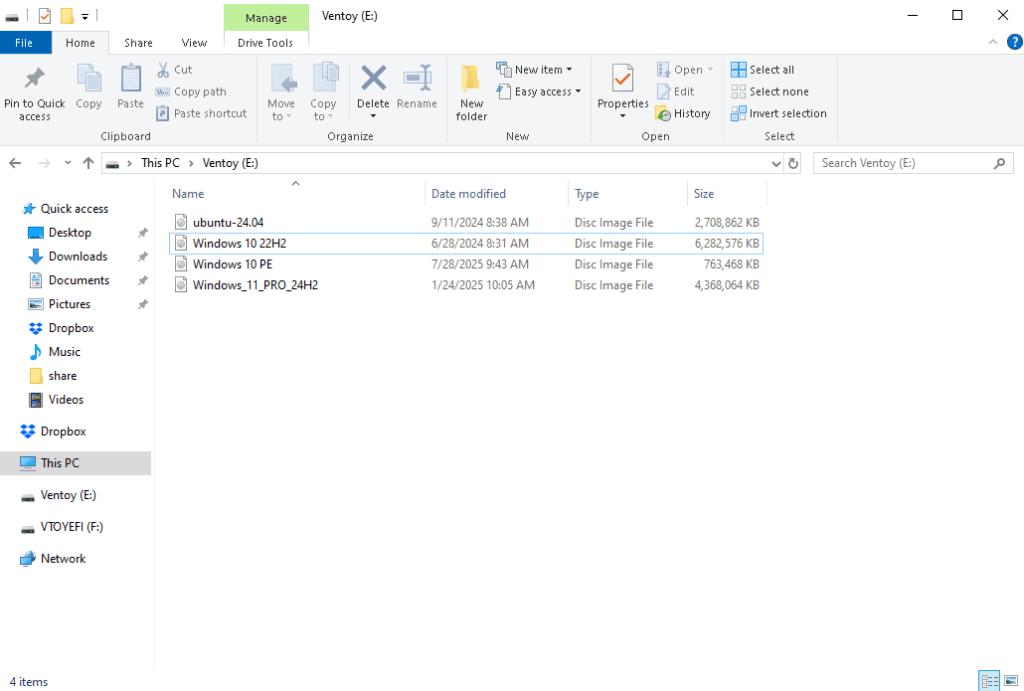
8. Your USB drive will now be split into two partitions:
-
-
A large ExFAT partition where you’ll store your ISO files.
-
A small FAT partition used by Ventoy itself.
(You’ll usually only see the ExFAT partition in File Explorer.)
-
9. Copy your ISO files (Windows, Linux, recovery tools, etc.) directly to the ExFAT partition. You can organize them into folders if you want — Ventoy will still detect them all.
✅ Tip: Avoid using spaces or non-English characters in folder names.
🔁 Press F3 during boot to switch between folder view (Tree View) and list view.
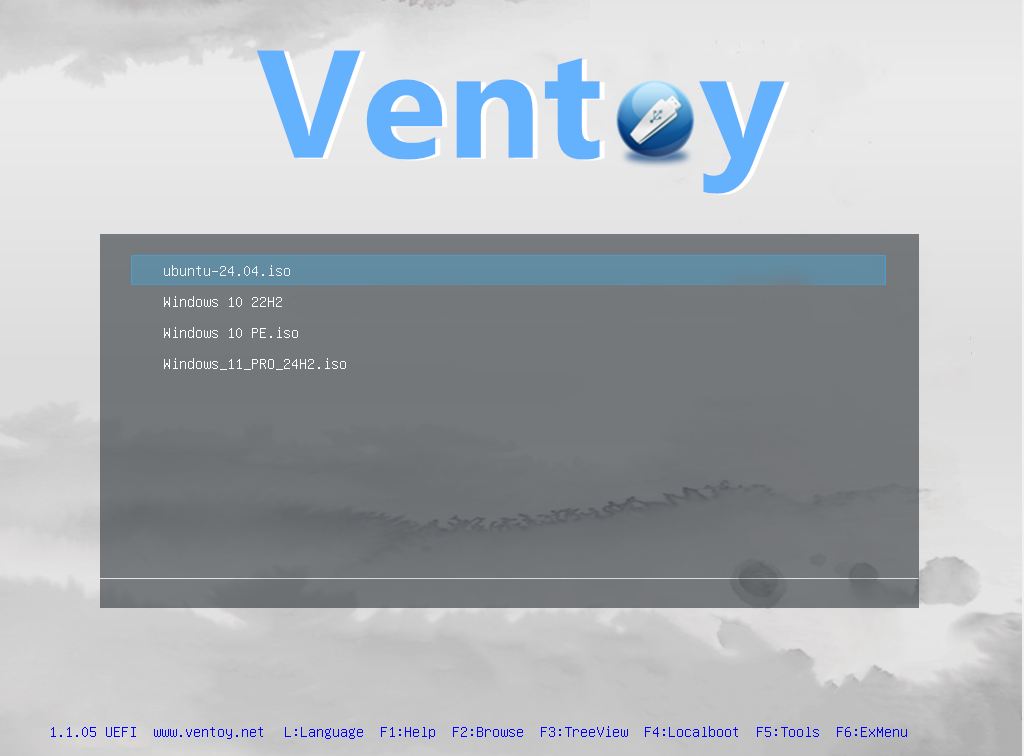
10. That’s it! Restart your computer and boot from the USB drive. You can set USB boot in your BIOS or use the Boot Menu key (usually F12, Esc, or F9).
Ventoy supports both Legacy and UEFI boot modes. When you boot from the drive, you’ll see a menu listing all the ISO files you added.
Basic settings before writing Ventoy to a flash drive
By default, Ventoy’s settings are optimized for most users and work well in typical scenarios.
However, if you want to customize the setup, you can do so before clicking the Install button. Just open the Options menu and adjust the settings to match your specific needs.
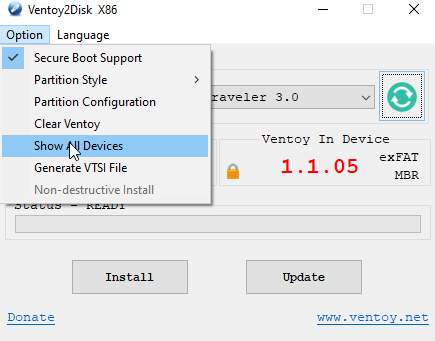
Ventoy Options Overview
Before installing Ventoy, you can access the Options menu to customize several advanced parameters. Here’s a quick overview of what each setting does:
-
Secure Boot Support
Allows the USB drive to boot without disabling Secure Boot in BIOS. This option is enabled by default, but note that it may not work on all systems. -
Partition Style (MBR or GPT)
Choose between MBR (supports both Legacy and UEFI boot modes) and GPT (supports only UEFI). MBR is generally more compatible across various systems. -
Create an Additional Partition
Lets you choose the file system for a secondary partition on the USB drive, which is useful for storing ISO files separately. -
Clear Ventoy
Removes Ventoy from the selected USB drive entirely. -
Show All Devices
Displays all storage devices, including internal hard drives and SSDs—not just removable drives. Use with caution. -
Create VTSI File
Generates a.vtsifile that can be used with Rufus to write Ventoy to a USB drive manually, in case the Ventoy2Disk utility fails to install it properly. -
Non-Destructive Installation
Installs Ventoy without erasing existing files on the USB drive. This compresses the current partition and creates a new one required for boot functionality.
I hope you found this guide helpful. You might also be interested in this:
Best Tools to Create a Bootable USB Drive
Explore other helpful tools in our Windows utilities section.