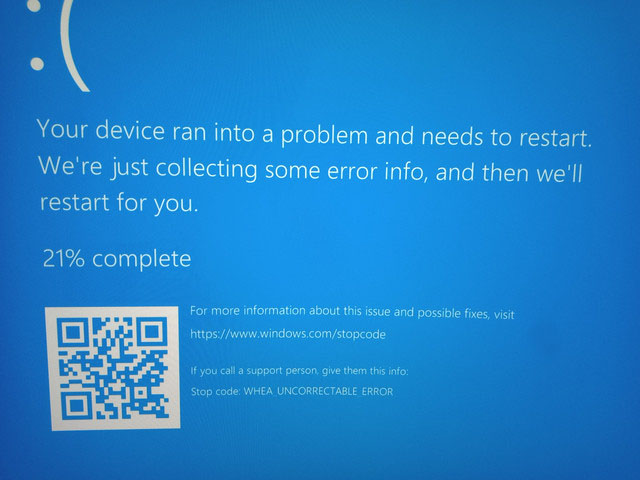
The WHEA UNCORRECTABLE ERROR blue screen in Windows 11 (and earlier versions) is one of the most frustrating and challenging issues to diagnose, typically indicating hardware-related problems. This guide explains what this error is, its common causes, and steps to resolve it.
What Is the WHEA UNCORRECTABLE ERROR?
The WHEA UNCORRECTABLE ERROR blue screen in Windows 11 indicates:
- A failure occurred in the Windows Hardware Error Architecture (WHEA), which handles hardware error processing.
- The error is “uncorrectable,” meaning the system couldn’t fix it automatically without restarting.
Essentially, a hardware issue was detected, and the system couldn’t resolve it (e.g., by resetting a device), leading to a system crash.
The error is typically caused by hardware issues, including:
- Unstable CPU overclocking.
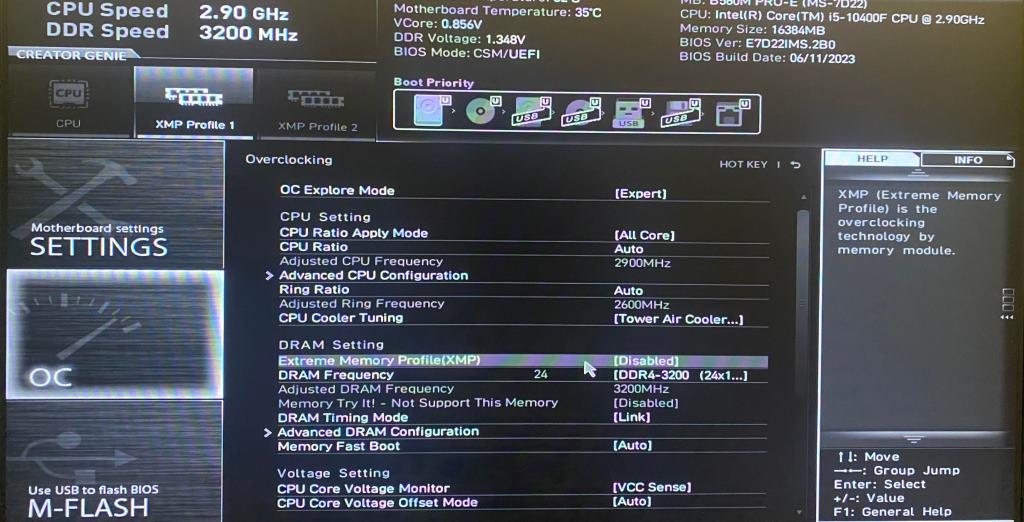
- Overclocked RAM or issues with XMP (Extreme Memory Profile) settings.
- Overclocked GPU.
- Overheating of components like the CPU, GPU, or (less commonly) SSDs.
- Faulty or incompatible RAM, or poor contact in RAM slots.
- Power supply or motherboard voltage issues.
- Physical damage or wear to hardware components due to overheating or other factors.
- Malfunctioning storage drives, cables, or connectors.
Solutions
There’s no one-size-fits-all fix for this blue screen error, but the following steps can help diagnose and resolve it:
1.Restore System to a Previous StateIf your system was working fine recently and hasn’t been reinstalled, try using System Restore to roll back to a date when everything functioned correctly.
2.Update Drivers After a Recent Windows InstallIf the error started after reinstalling Windows, manually download and install all chipset drivers, as well as controller and power management drivers, from the manufacturer’s website for your motherboard or laptop.
3.Disable OverclockingIf you’ve overclocked your CPU, GPU, or RAM, disable it in the BIOS/UEFI or overclocking software.
4.Turn Off XMP ProfilesDisable XMP profiles in the BIOS/UEFI (refer to your motherboard manual for instructions; reverse the steps for enabling XMP).
5.Check for Overheating and Voltage StabilityUse tools like AIDA64 or HWiNFO to monitor component temperatures and voltage stability under load. If voltages (especially the 12V rail) deviate by more than 5-10% from nominal values, the power supply may be faulty.
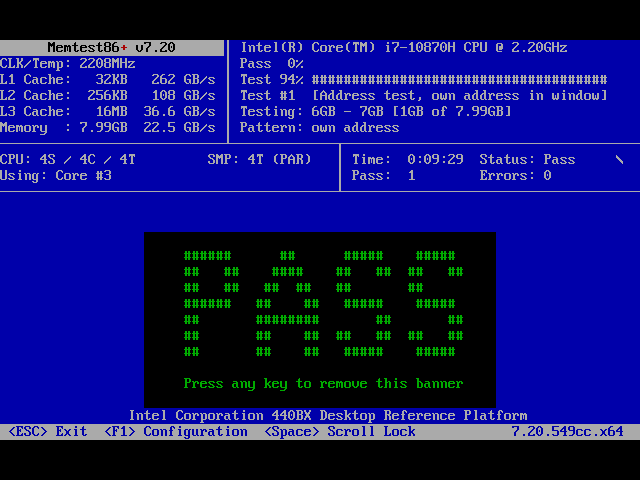
6.Test RAM for ErrorsRun a memory test using tools like MemTest86+ or PassMark MemTest to check for faulty RAM modules.
7.Reset BIOS/UEFI SettingsReset BIOS/UEFI to optimized defaults (often labeled “Load Optimized Defaults”). Note that you may need to reconfigure the boot order afterward.
8.Disable Fast StartupIf the error occurs during shutdown and startup but not after a restart (using the “Restart” option), try disabling Fast Startup in Windows settings.
9.Update BIOS/UEFICheck for BIOS/UEFI updates on your motherboard or laptop manufacturer’s website. Follow their instructions carefully, as updating the BIOS can be risky if done incorrectly.
10.Inspect Hardware ConnectionsVerify that all hardware components (drives, GPU, RAM) are securely connected. Check SATA cables for damage and replace them if needed. Look for swollen capacitors on the motherboard.
11.Test Hardware ComponentsIf you suspect a specific component, test the system without it. Disconnect non-essential hardware (extra drives, GPUs, or RAM modules) and check if the error persists. Reconnect components one by one, powering off between tests, to identify the culprit.
If none of the above reveals hardware issues and the WHEA UNCORRECTABLE ERROR persists, consider performing a clean install of Windows 11 to rule out software-related causes.
Explore other helpful tools in our Windows utilities section.