What Is Virtualization-Based Security (VBS)?
Virtualization-Based Security (VBS) is a Windows 11 feature that isolates parts of system memory to protect your computer from malicious code, unsigned drivers, or untrusted software. It’s designed to improve system security by running sensitive processes in a secure virtual environment.
However, this added protection can sometimes reduce system performance — especially noticeable in gaming or heavy workloads. Many users report smoother performance after turning it off. If you’re looking to boost FPS or optimize your system, here’s how to disable VBS in Windows 11 safely.
How to Disable VBS in Windows 11
You can turn off VBS in several ways, depending on your Windows edition and preferences. Below are five effective methods.
1. Disable VBS from Windows Settings
-
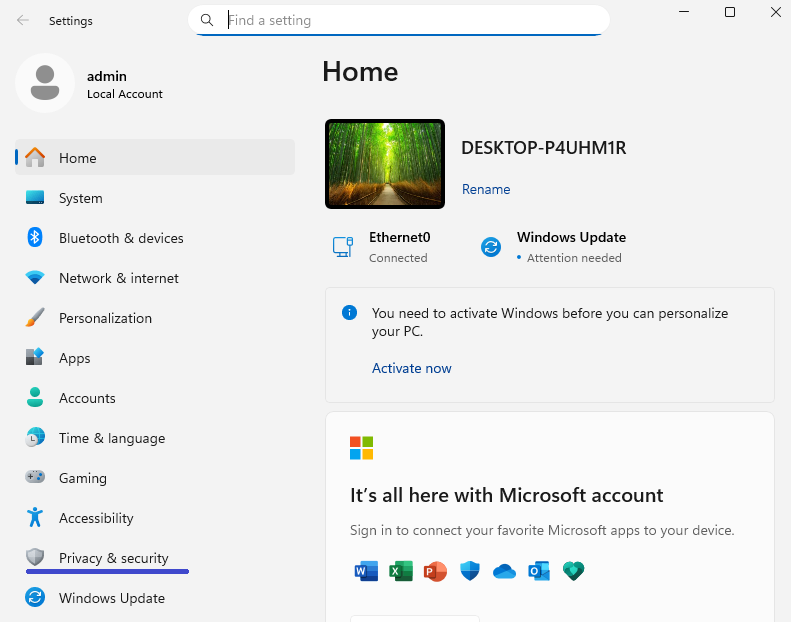
Press Win + I to open Settings.
-
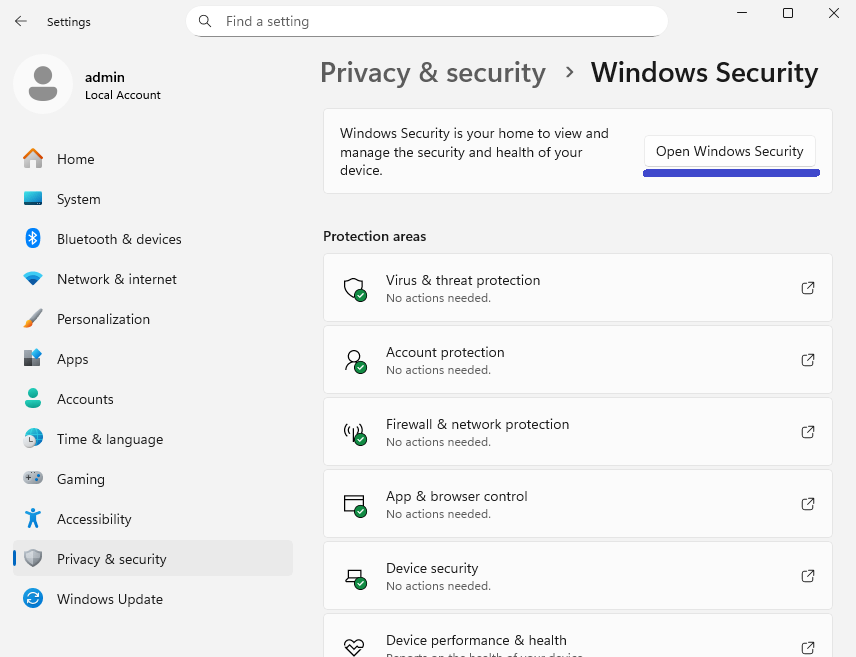
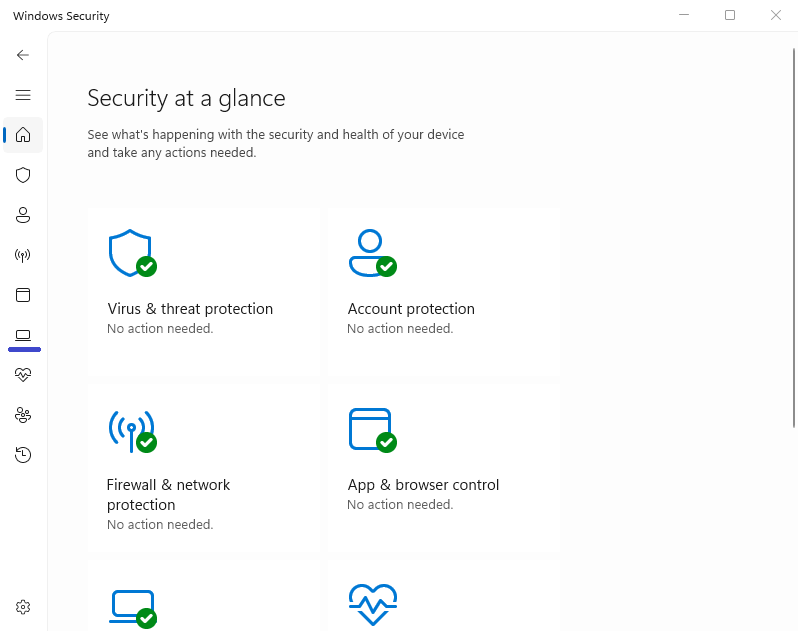
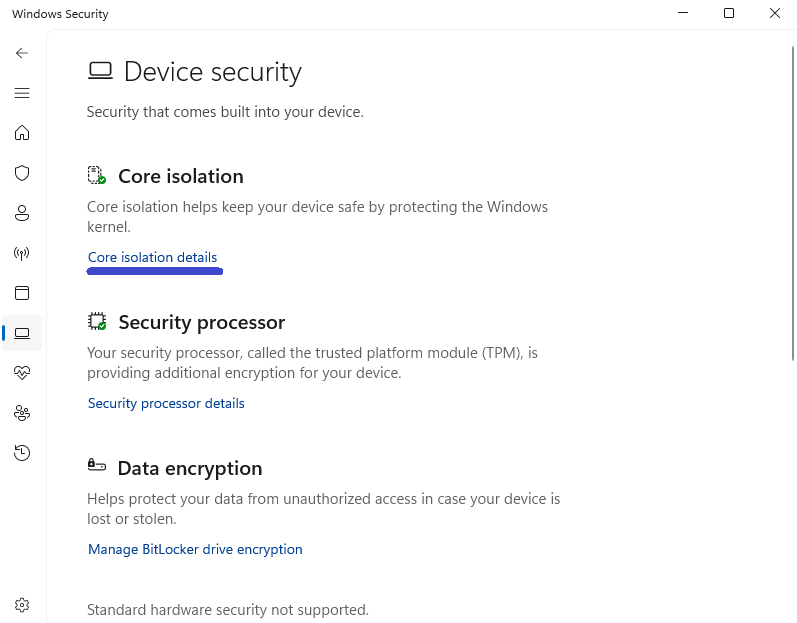
Navigate to Privacy & Security → Windows Security → Open Windows Security.
-
Select Device Security from the left sidebar.
-
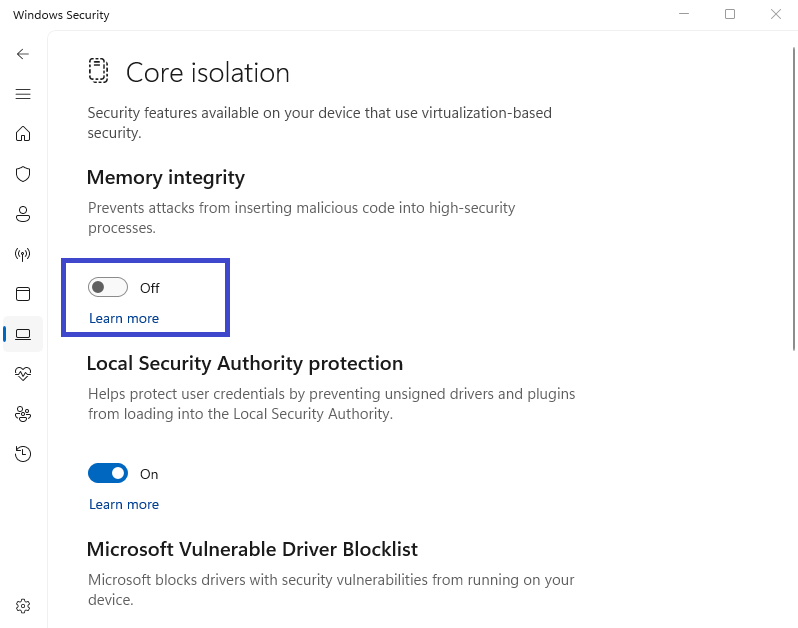
Under Core isolation, click Core isolation details.
-
Toggle Memory Integrity to Off.
-
Restart your PC and check if performance improves.
💡 Tip: Disabling “Memory Integrity” can instantly boost gaming benchmarks by up to 10–15% on some systems.
2. Turn Off VBS Using Group Policy Editor (Pro Users Only)
This method is ideal if you use Windows 11 Pro or Enterprise.
-
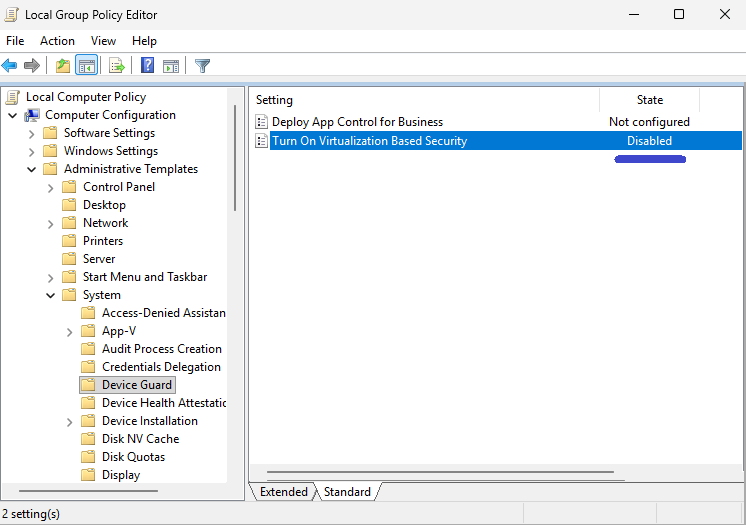
Press Win + R, type
gpedit.msc, and hit Enter. -
Go to:
Local Computer Policy → Computer Configuration → Administrative Templates → System → Device Guard -
Double-click Turn On Virtualization-Based Security.
-
Choose Disabled, then click Apply → OK.
-
Restart your computer.
(Note: Group Policy Editor isn’t available on Windows 11 Home.)
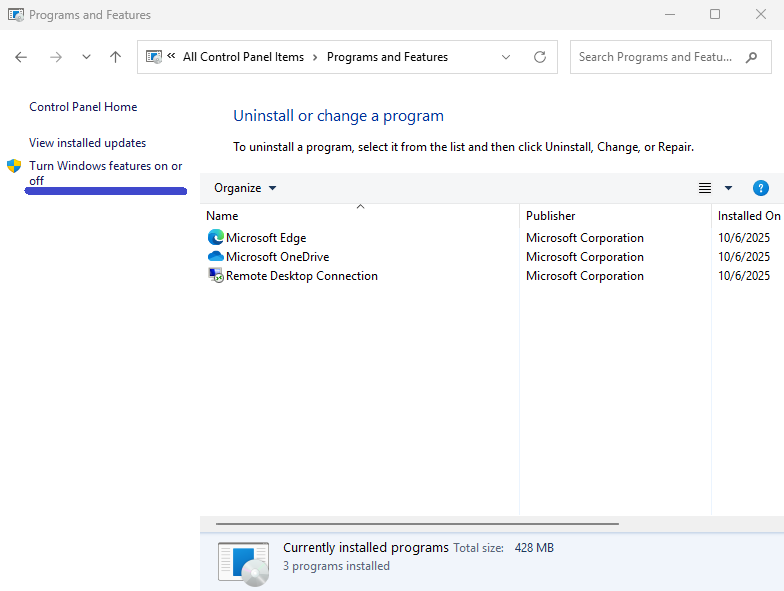
3. Disable Virtualization Features via Control Panel
You can remove Windows components that use virtualization.
-
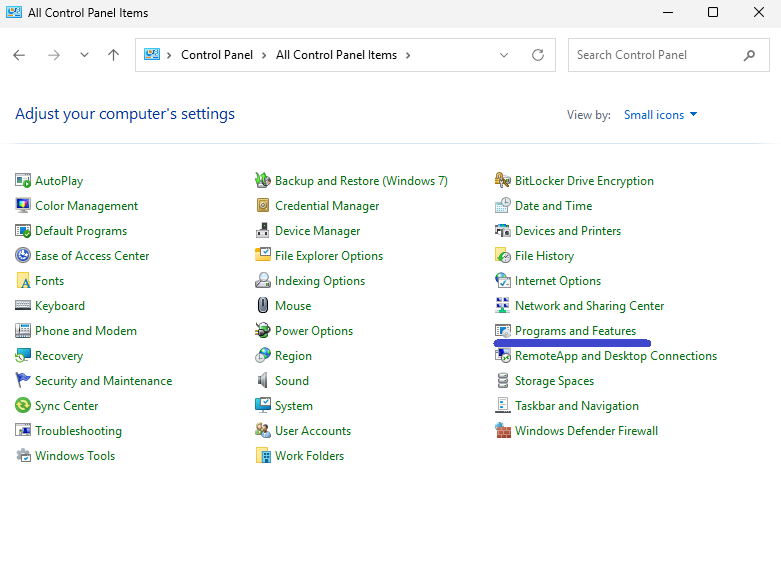
Open Control Panel → Programs and Features.
-
Click Turn Windows features on or off on the left.
-
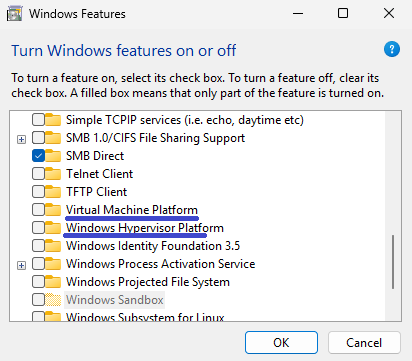
Uncheck the following options:
-
Microsoft Defender Application Guard
-
Virtual Machine Platform
-
Windows Hypervisor Platform
-
-
Click OK, then restart your PC.
After reboot, open the same window again to confirm that these options remain unchecked.
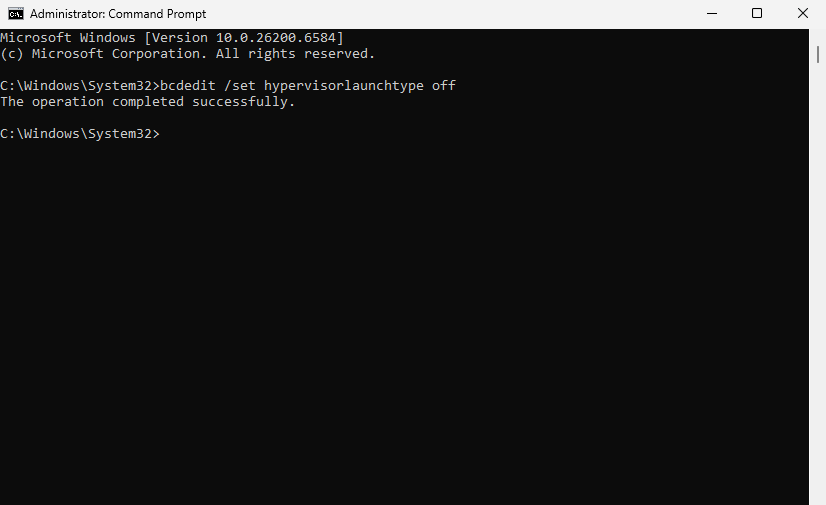
4. Use Command Prompt to Disable VBS
If you prefer a quick command-line method:
-
Search for Command Prompt, right-click, and choose Run as administrator.
-
Type the command below and press Enter:
-
Close Command Prompt and restart your PC.
Once your system boots, test your apps or games to see if performance has improved.
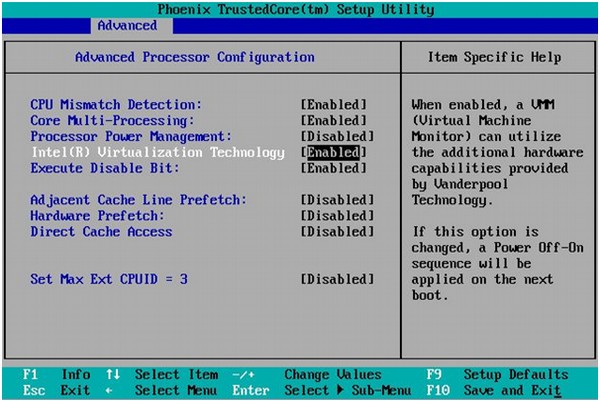
5. Turn Off Virtualization in BIOS
If none of the above methods work, disable virtualization directly from the BIOS:
-
Restart your PC and press the BIOS key (often F2, F10, or Delete) during startup.
-
Navigate to the Advanced or CPU Configuration tab.
-
Find and disable SVM Mode (for AMD CPUs) or Intel VT-x (for Intel CPUs).
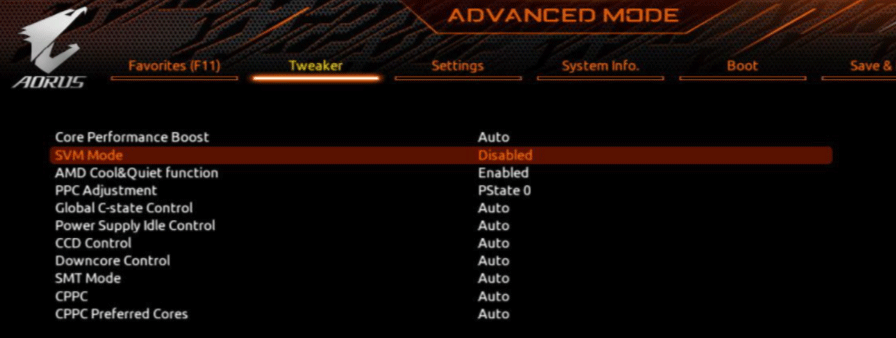
-
Save changes (usually F10) and restart.
This completely disables the virtualization layer that VBS relies on.
How to Check If VBS Is Enabled
To verify the current VBS status:
-
Press Win + R, type
msinfo32, and press Enter.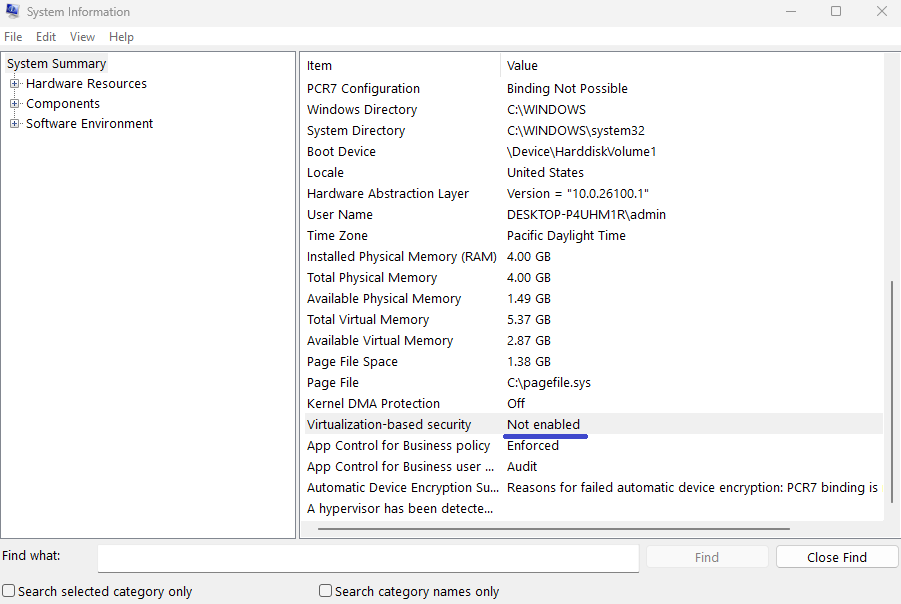
-
Scroll to the bottom of the System Information window.
-
Look for the Virtualization-Based Security field — it will show Enabled or Not enabled.
Should You Disable VBS in Windows 11?
If you prioritize gaming performance, rendering speed, or system responsiveness, disabling VBS can help.
However, if your PC handles sensitive data or security is your top concern, keeping it enabled might be better.
For most users — especially gamers — turning off VBS offers a noticeable performance boost without major risks.
Final Thoughts
Virtualization-Based Security is a valuable Windows 11 feature for protection, but it’s not essential for every user. Disabling it can unlock extra performance, making your PC faster and smoother.
If you’re troubleshooting lag or frame drops, it’s worth testing your system with VBS turned off — you can always re-enable it later.